Additional Configuration
Podman requires you to create a virtual machine with user-specified characteristics before you can run an image. You can think of this as specifying the ‘hardware’ of the computer before you buy it (How much RAM? How big a hard drive? And so on.). In principle, this means that you can have more than one valid configuration at a time which would allow you to tune each virtual machine to your needs (one machine could have a lot of memory, another a lot of storage).
Considerations
You should create a virtual machine that has enough resources to do the job, but not so much that it affects your ability to do other work on the computer. Since every computer is unique, you need to look at your computer’s configuration and work it out from there but below is some basic guidance. You will find it easiest to configure this using Podman Desktop (next section) and clicking on the Settings and Create Podman machine.
| If your computer has | 8GB | 16GB | 32GB | 64GB |
|---|---|---|---|---|
| We’d recommend | 1-2GB | 2-3GB | 4–8GB | Lucky you! |
| If your computer has | 2CPUs | 8CPUs | 16CPU | 32CPUs |
|---|---|---|---|---|
| We’d recommend | 1CPU | 2-4CPUs | 4–8CPUs | Lucky you! |
| If your computer has | 10GB Free | 20GB Free | 100GB Free | > 150GB Free |
|---|---|---|---|---|
| We’d recommend | Tidying up | 10GB | 30GB | Lucky you! |
Note that some Windows machines come configured with two hard drives (usually called C and D); in those cases D is intended for data and often doesn’t have much on on it! In those cases, you can change the Image Path option in Podman desktop to store the image on the D drive and avoid problems with filling up your C drive.
Initialising a Podman Machine
The easiest way to configure your Podman machine is to use Podman Desktop. When you launch the Desktop, at the lower-left you’ll see a Settings button. Click this and then (if it’s not already selected) choose the Resources tab.
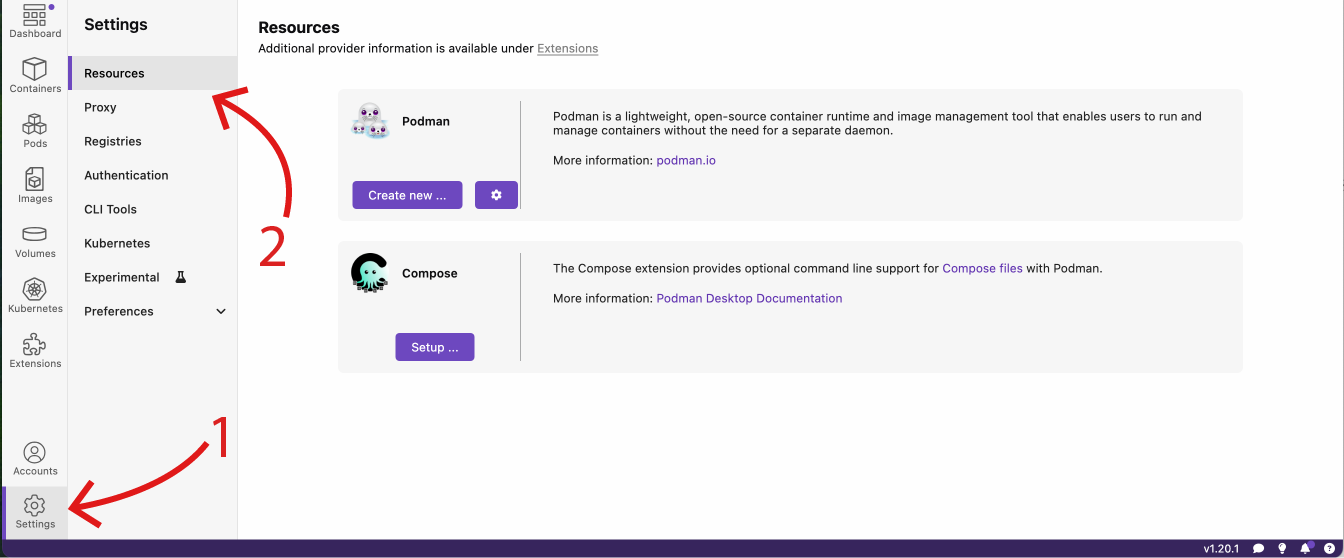
Select Create new and Podman will pick some sensible defaults for you; however, you might want to fine-tune the settings in line with the options set out above in Tables Table 1 and Table 2 especially. Here’s one setup for a fairly recent Apple MacBookPro M2.
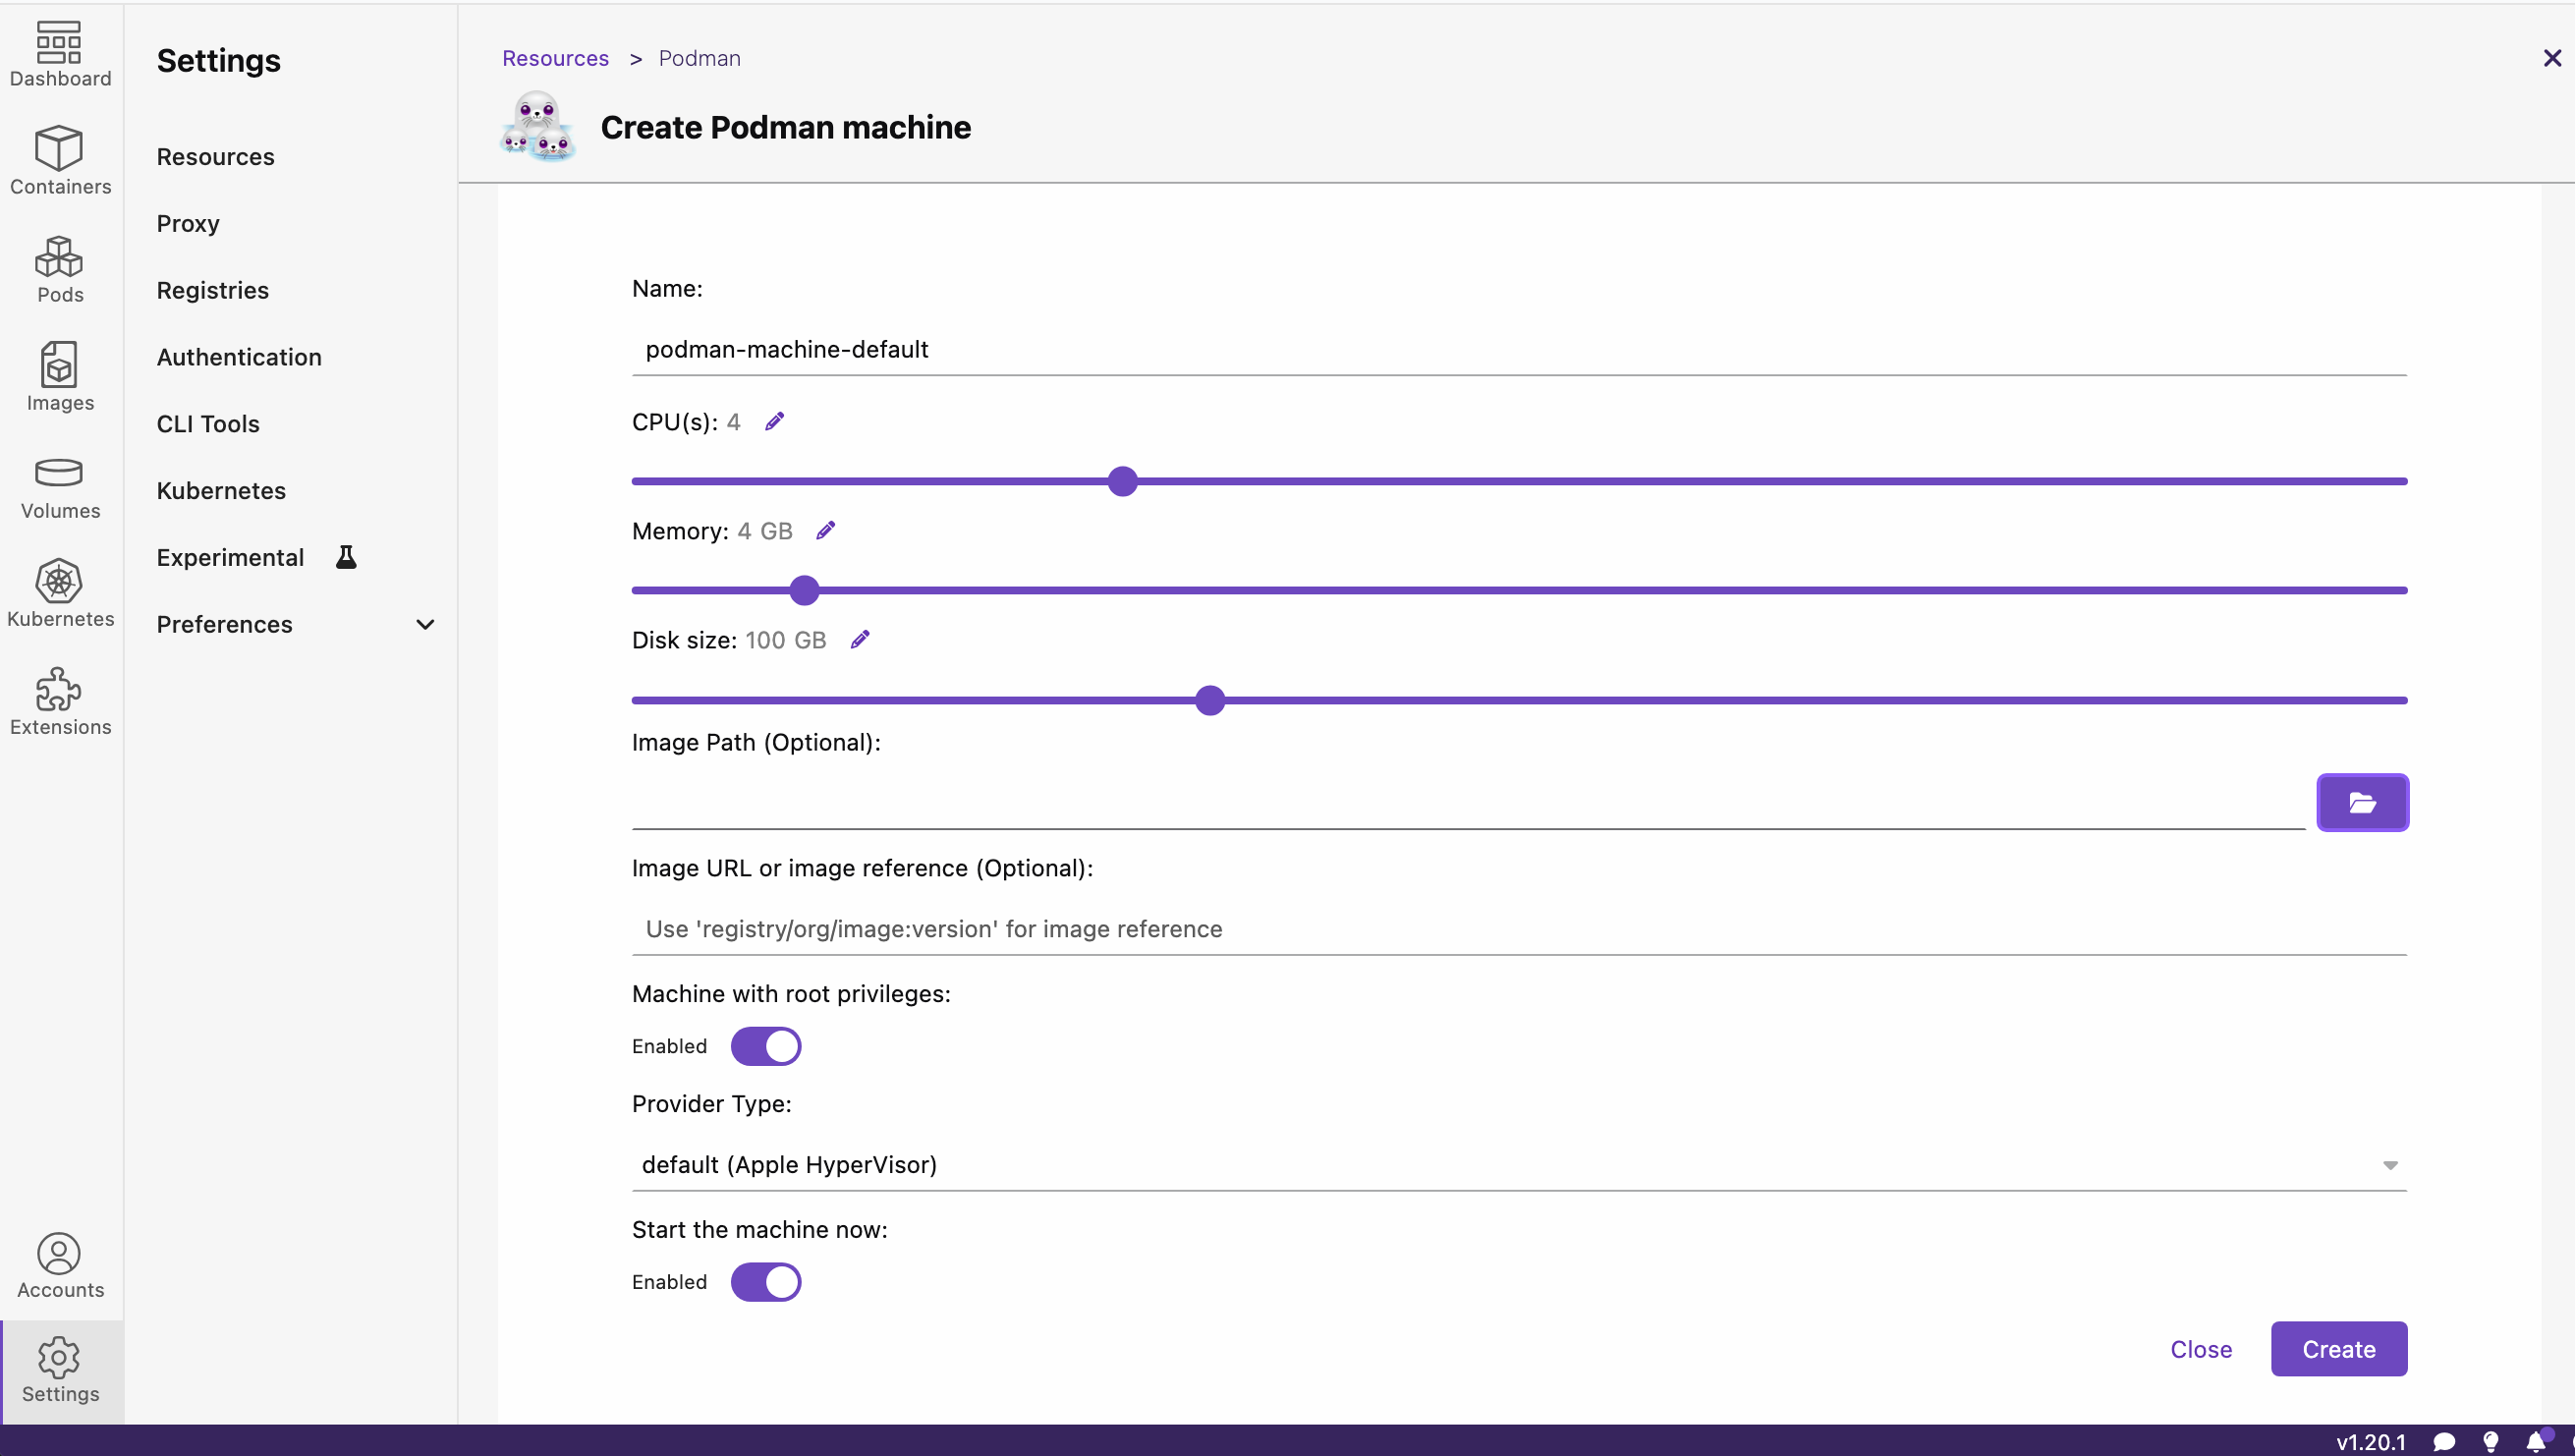
Click on Create and you are now ready to run your first container from an image!