Advanced Topics
This page covers more advanced topics related to the use of Docker and VSCode with the jreades/sds:2024 image. These are all entirely optional steps if you want to get deeper into managing Docker and managing Python code in ways not covered in Foundations, so you should only explore these if you are comfortable with what we are already doing and are reasonably knowledgeable about the development ‘stack’ (in which case, why are you taking Foundations?).
Bash Script
This next section is only if you want to start using multiple images/containers or manipulating the way the jreades/sds:2024 starts up. This is not needed for most students.
As well, this script only works if you have a full Unix/Linux-compatible system. So macOS has this by default. On Windows you need to take the next step after install WSL2 and actually install a full Linux distribution (we’d suggest Ubuntu).
There are so many additional options for configuring Docker that we created a Bash script to do most of it for you; however, this needs to be paired with a configuration file that is kept in the same folder as the docker.sh script.
So it’s an extra step to getting up and running, but it allows you to easily change the port on which Jupyter Lab is served as well as to turn Quarto and Dask on/off by commenting/editing/uncommenting the port number in the config.sh file. You cannot run this in the Windows Power Shell.
This simplifies the process to the point of starting Docker with:
bash docker.sh startAnd you can cleanly shut down the container using:
bash docker.sh stopDask and Quarto
This next section is only if you need to run either Dask or Quarto (both of which are provided by jreades/sds:2024). This is not needed by students in Week 1, though you will use Quarto for the group project.
To run Dask and Quarto you need to ‘open up’ other ports on the Docker image:
docker run --name sds2024 --rm -d \
  -p 8888:8888 -p 4201:4201 -p 8787:8787 \
  -v "$(pwd):/home/jovyan/work" \
jreades/sds:2024-intel jupyter lab --LabApp.password='' --ServerApp.password='' --NotebookApp.token=''Remember that on a M-chip Mac the above command changes to:
docker run --name sds2024 --rm -d \
  -p 8888:8888 -p 4201:4201 -p 8787:8787 \
  -v "$(pwd):/home/jovyan/work" \
  jreades/sds:2024-silicon jupyter lab --LabApp.password='' --ServerApp.password='' --NotebookApp.token=''
Using the Terminal built into the sds2024 container, you will then need to ensure that the version of Quarto built into the image runs on the same port that you specified when starting up Docker:
quarto preview --host 0.0.0.0 --port 4201Notice the everything to do with Quarto is on port 4201, but note additionally the --host 0.0.0.0 that is required to allow you to view Quarto’s output if you want to serve a web site, for instance, instead of static content outside of the Docker container.
The Dask port is where the Dask task manager will be visible when you are making full use of its multiprocessing features within the Docker container (e.g. using four cores at once where you’ve enabled this is Docker preferences on your Mac or Windows machine).
VSCode Integration
This next section is only if you want to program in VSCode instead of Jupyter Lab. This is not needed for most students.
In principle the below will work. We have it working on Mac OSX and the same process should work on Windows. In practice, this should be considered a ‘beta feature’ in the sense that the documentation is still in development and we’re working out a few kinks. We’ll keep you posted on our progress!
Using Devcontainer
We’re investigating why this approach doesn’t work, but we’re currently unable to get the devcontainer approach to run successfully despite having attempted to update it for 2023. We’ll correct this when we can.
The easier (but less tested) way to connect is to download the contents of test-vscode-project from GitHub. You should place the three resources in the same directory on your computer where you plan to save your notebooks, data, and other resources (e.g. $HOME/Documents/CASA/fsds/).
You then tell VSCode to Open Workspace from File and point it to this directory. It should then ask if you want to run the container associated with the project. The first time you do this it may take some time to get started as it still has to pull the image from Docker Hub. You can break this into steps by running docker pull jreades/sds:2024-intel (docker pull jreades/sds:2024-silicon on a Silicon Mac) before dealing with downloading these files and moving them into position.
Using Attach to Running Container
To enable VSCode integration you’ll need to create additional ‘mount points’ (‘locations’ on your computer’s file system) that the Docker image can access. At this point the command becomes very long, which is why there is a script designed to make this a more straightforward process provided below.
Remember to change the image name to jreades/sds:2024-silicon if you are using a M-type Mac.
docker run --rm -d --name sds2024 \
  -p 8888:8888 -p 4201:4201 -p 8787:8787 \
  -v "$(pwd):/home/jovyan/work" \
  -v "${HOME}/.vscode/containers/sds2024-extensions:/home/jovyan/.vscode-server/extensions" \
  -v "${HOME}/.vscode/containers/sds2024-insiders:/home/jovyan/.vscode-server-insiders" \
  jreades/sds:2024-intel jupyter lab --LabApp.password='' --ServerApp.password='' --NotebookApp.token=''
Required Extensions
This then enables you to install the required integration extensions as follows:
- The Dev - Containers extension from Microsoft, which will allow you to use a Docker container as a virtual environment from VSCode.
- The Docker extension from Microsoft, which allows you to interact with images/containers from within VSCode.
- The Jupyter exension, which will allow you to execute Jupyter Notebooks directly within VSCode.
- The Jupyter Renderers extension which adds support for media outputs, especially interactive ones.
- The Pylance extension which works as a language server (will do code highlighting, syntax checking, etc.) for Python.
- The Python extension which provides rich support for Python >= 3.7.
- The Gremlins Tracker extension which highlights non-printing characters that can make code fail to execute properly.
- The GitHub CoPilot extension which provides AI-assisted code completion and suggestions. To get the most from this you will need to add your UCL email address to your GitHub account and then request access to the academic program.
The “Jupyter Keymap” exension which provides the same keymaps in VSCode that exist in JupyterLab is globally enabled and does not need to be installed..
You can supplement these with the Markdown linting extension and a range of other tools.
Once this is all installed, you start up your Docker container (as above) and then tell VSCode to connect to that container using the instructions provided.
Once you’ve gone through this once it should be fairly straightforward on subsequent runs. At that point you can browse to the notebooks (which are usually being mounted from your own machine) and run them as if you were doing all of this within the Docker container. It’s kind of mind-melting but pretty cool.
Connect
Use the Remote Containers icon (![]() ) to bring up the ‘open’ menu.
) to bring up the ‘open’ menu.
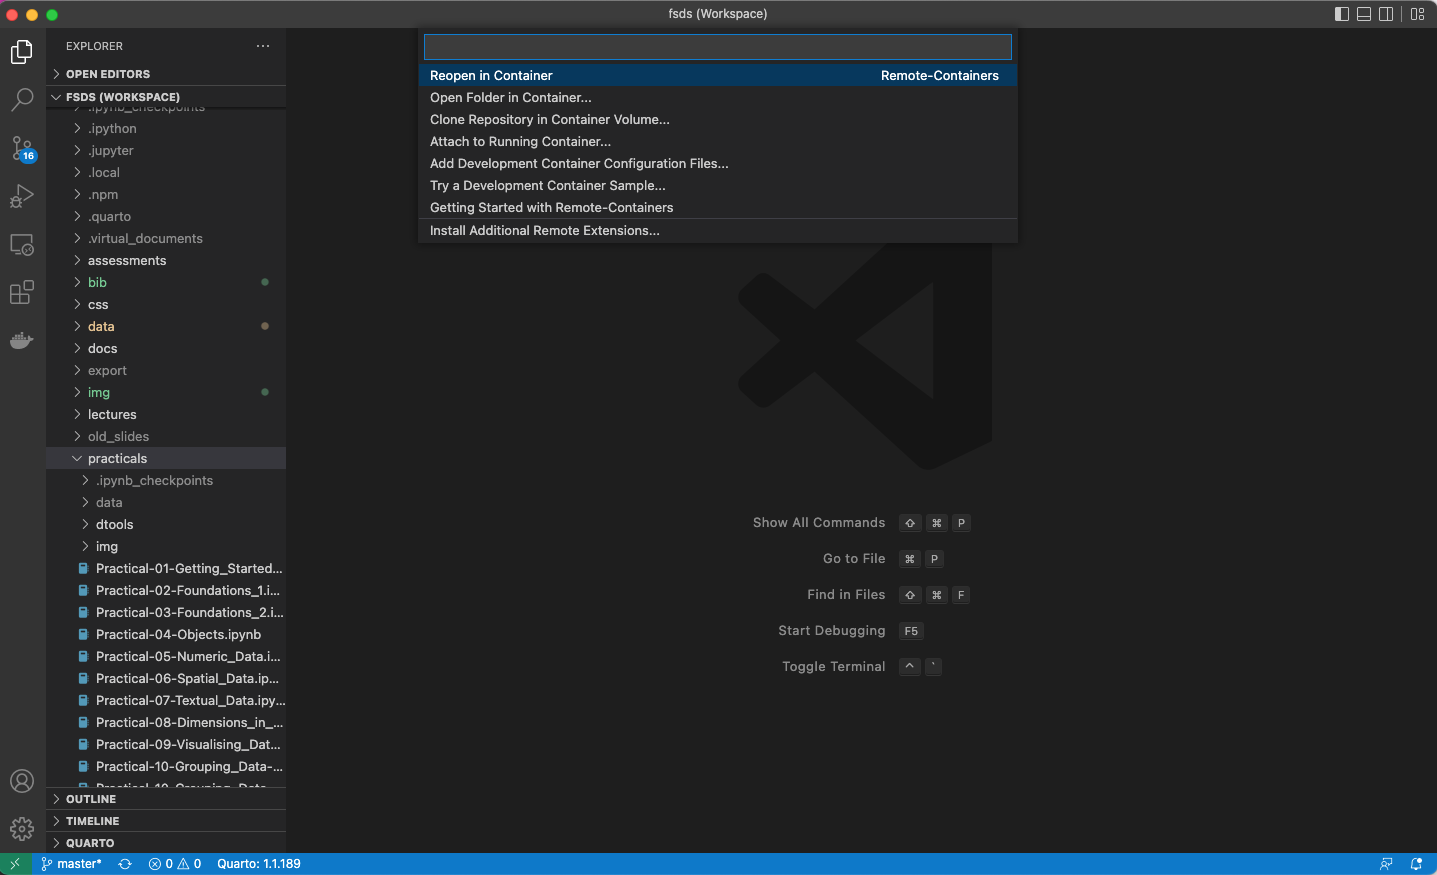
Attach
Choose the Attach to Running Container... option to list active Docker containers.
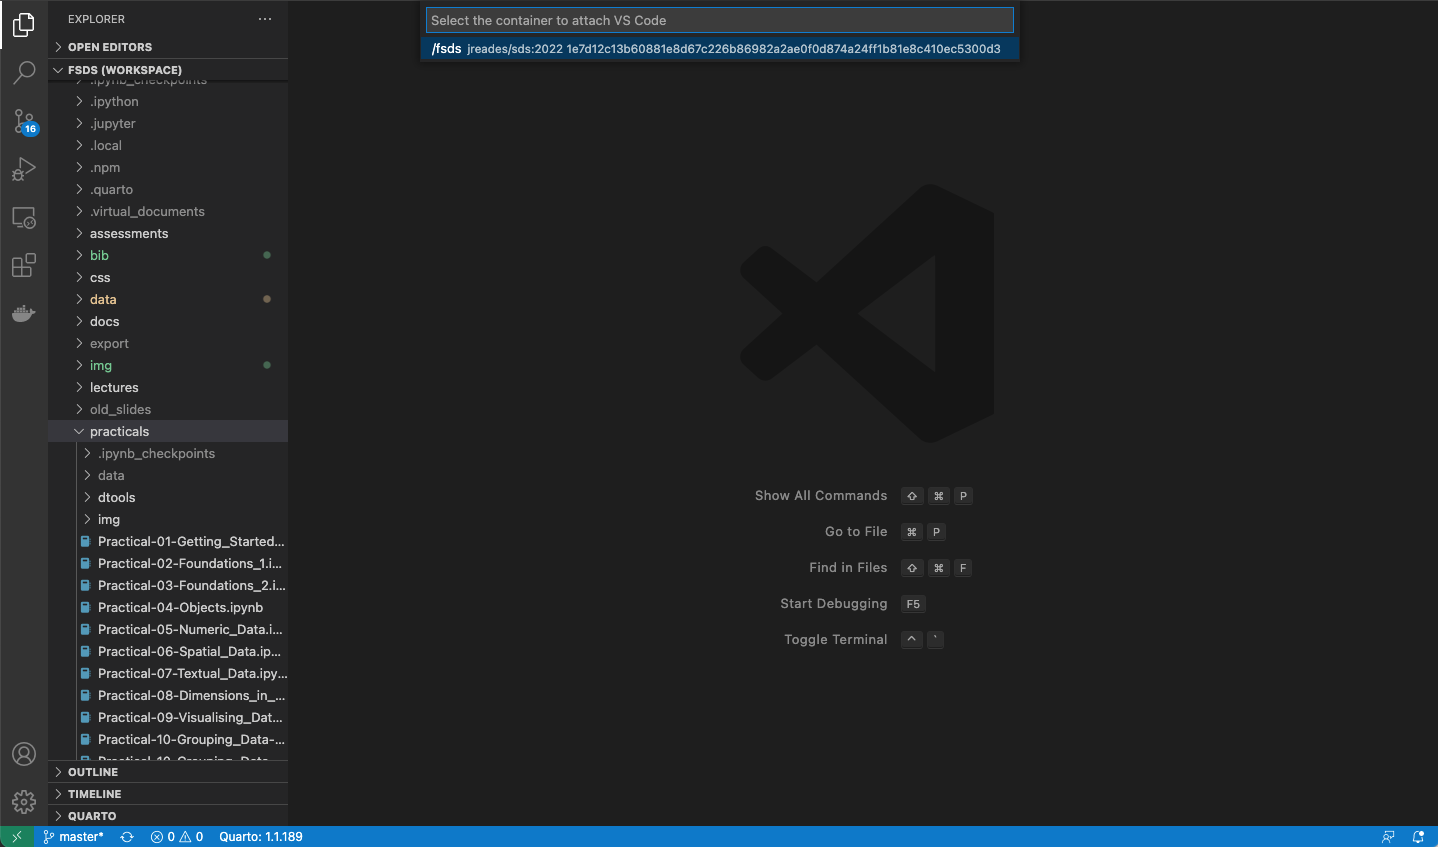
In this screenshot we’re running one container named fsds that was built from the jreades/sds:2022 image. Your container may have a different name (e.g. sds2024) but the image should be named jreades/sds:2024-intel or jreades/sds:2024-silicon:

Attached!
If all has gone well, then a new window should open and you’ll notice one small, but significant change:
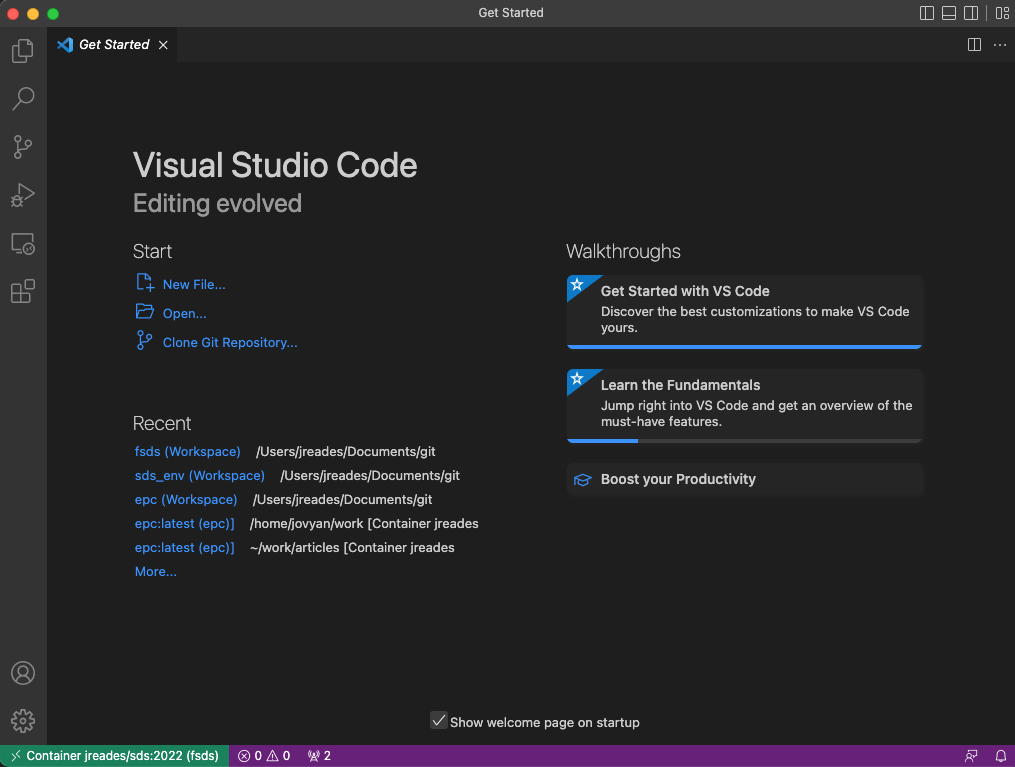
VSCode confirms that this window is now connected to the fsds container1:

Open Sesame
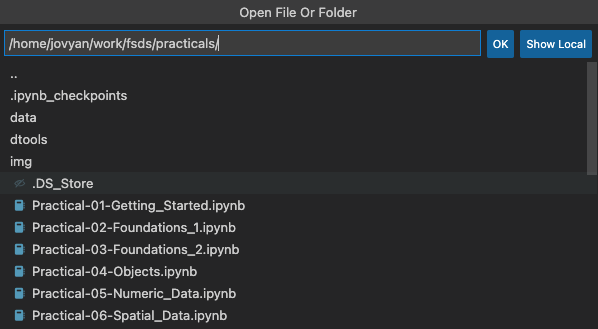
Now, if we try to open a file/folder under the open menu (![]() ), you’ll notice that we’re not browsing ‘our computer’ any more! Instead, we’re browsing files on the Docker container.
), you’ll notice that we’re not browsing ‘our computer’ any more! Instead, we’re browsing files on the Docker container.
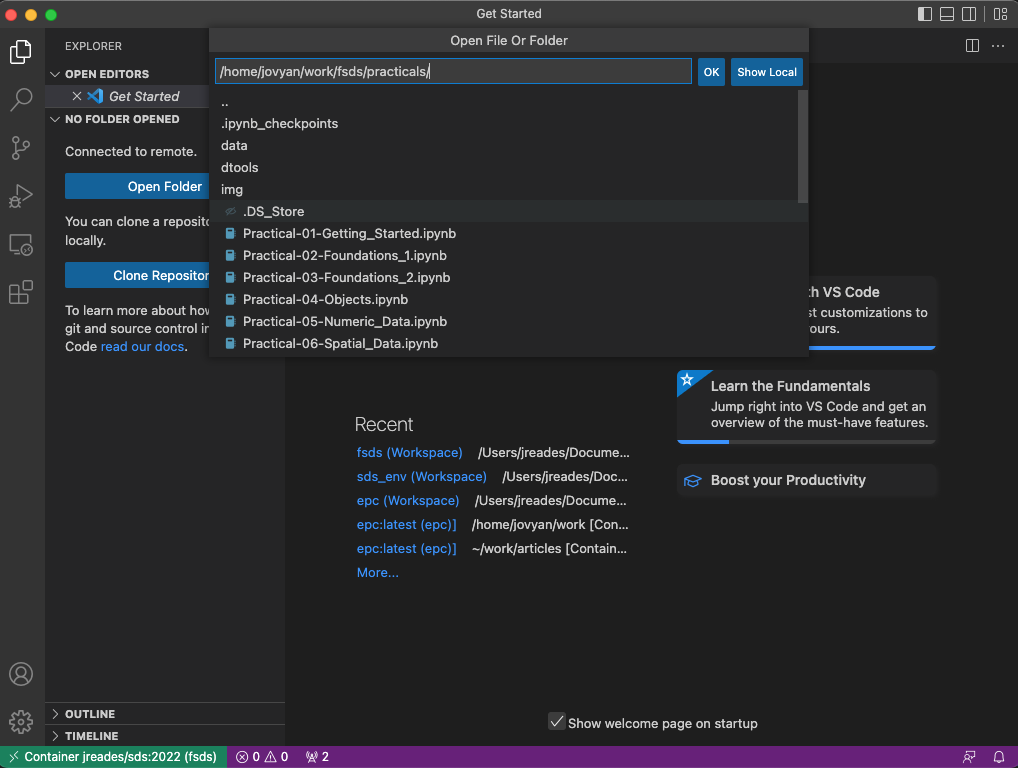
So how do we find the notebooks? Well, when we launched the container we had this line:
-v "$(pwd):/home/jovyan/work" \That told Docker to connect the current working directory (where you ran the command) to /home/jovyan/work on the container. So anything under /home/jovyan/work is actually a file that can be found on our computer. Below, you can see that I’ve browsed to the fsds/practicals directory on my computer and am now ready to start running (and editing) my notebooks using an IDE instead of JupyterLab’s web interface:
Extensions
You need to install the same VSCode extensions that you’d use when running Python locally on your computer into the ‘remote’ container. VSCode will do a pretty good job prompting you, but you’ve got the list above and can also seem them (notice I’ve selected CONTAINER) on the left-hand Extensions (![]() ) menu in the screenshot below:
) menu in the screenshot below:
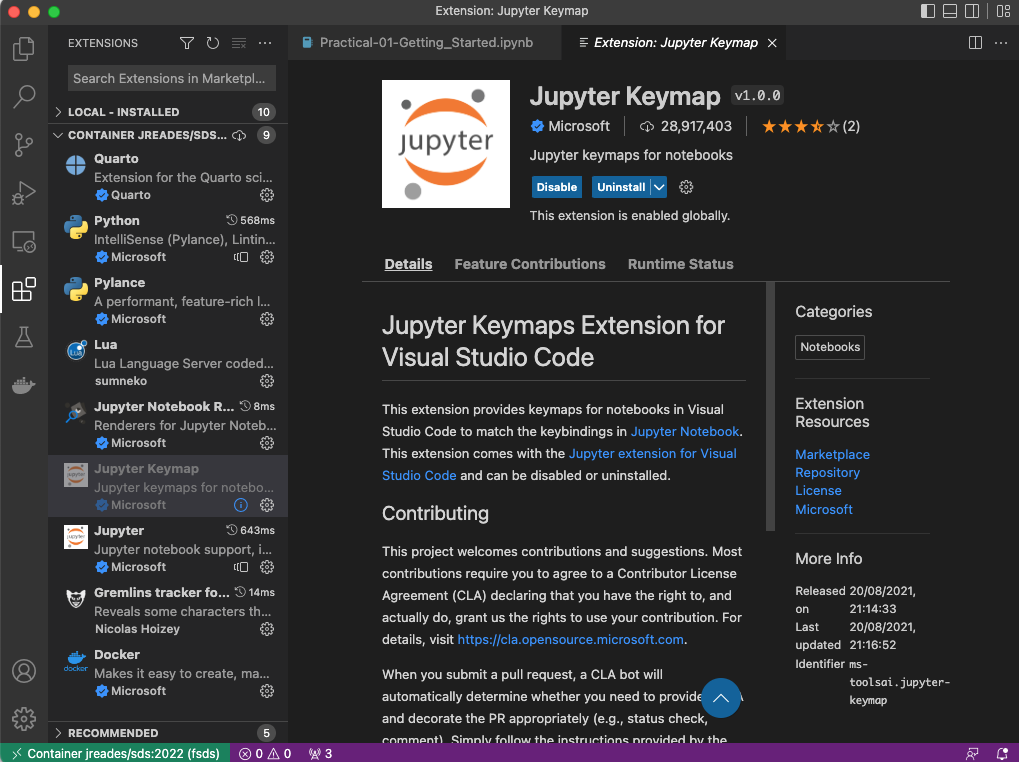
Once the extensions are installed, provided that you use the same startup command each time (and don’t change the name of the container from fsds) those extensions should be ready-to-go and you won’t need to reinstall again.
Success!
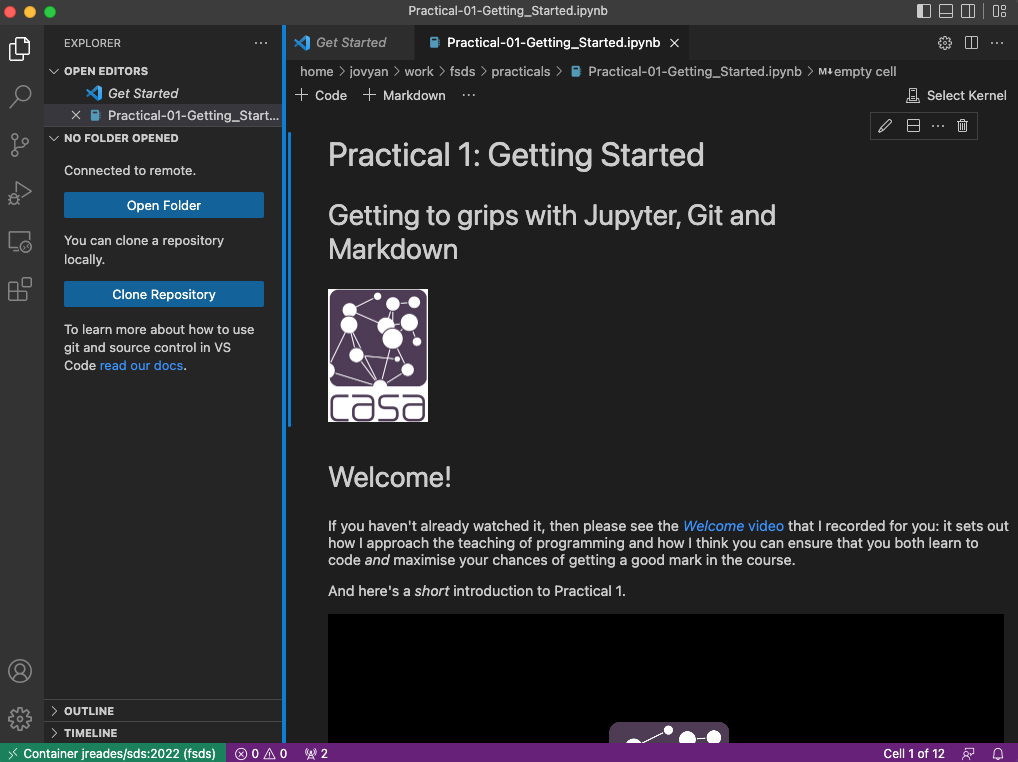
And here we go…
Footnotes
Remember that your container may be called something else, like
sds2024, but that doesn’t matter so long as you are using the right image (e.g.jreades/sds:2024). You can name the container anything at start-up using--name <your_chosen_name>and if you don’t provide one then Docker will make one up.↩︎